Making changes with GitHub Desktop#
Scenario: You’ve created a repository through the web interface, but now you have multiple files that you would like to add. Do you see an easy way to do this in the web interface?
Step 1: Open GitHub Desktop and Sign In#
On Windows, go to File > Options. On Mac, go to GitHub Desktop > Preferences.
On the Accounts tab, click the Sign In button to sign in with your GitHub credentials in the browser.
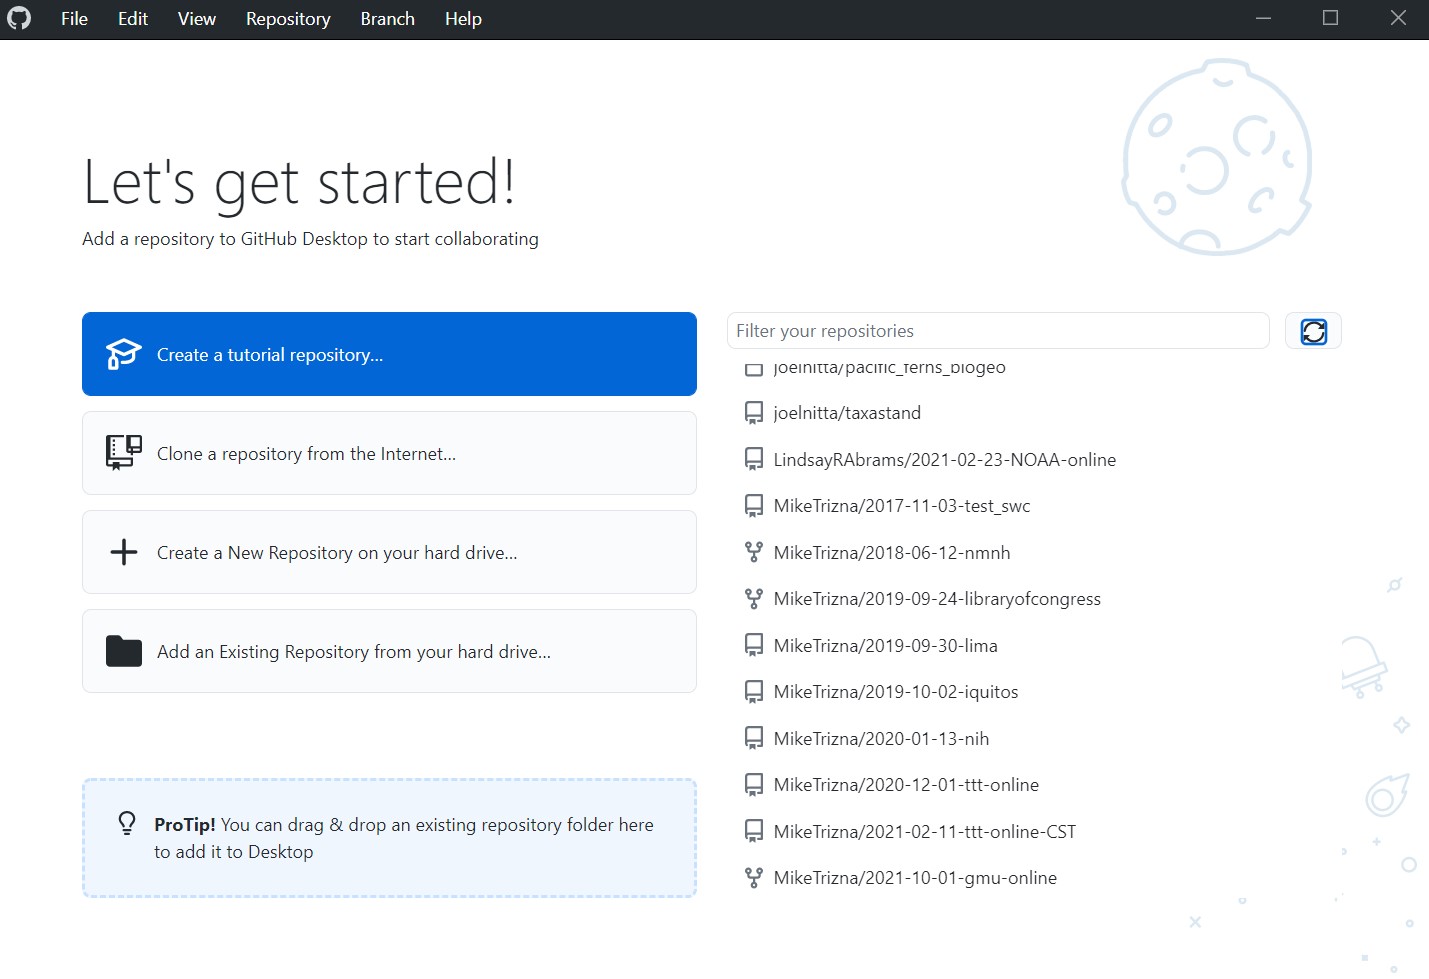
Even though the friendly welcome screen has a big button to clone a repository, that welcome screen won’t always be there. The more consistent way to do this is to click on File > Clone repository.
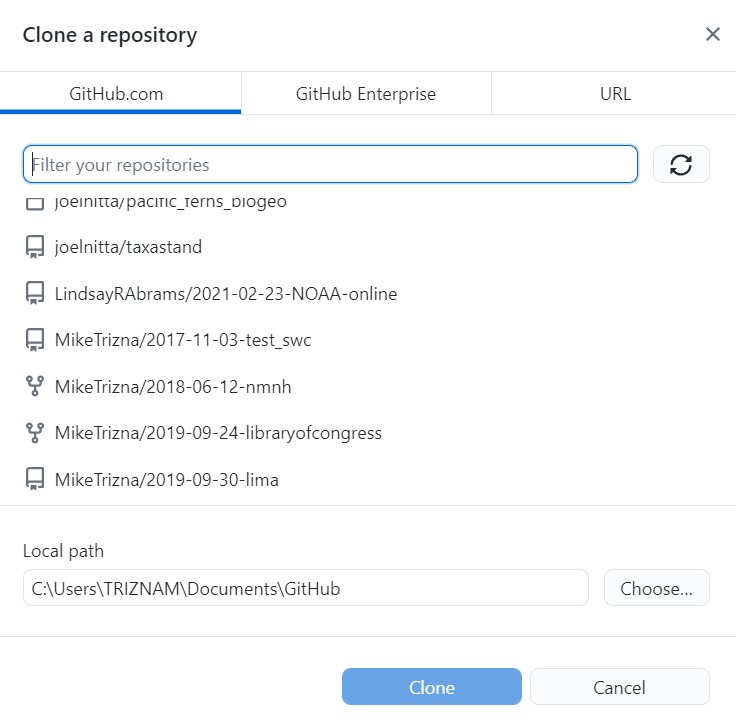
In the Github.com tab, all of your repositories will be listed. Scroll until you find the recipes repository you created in the previous lesson.
Now choose a folder on your computer where it makes sense to save those files. The default is probably fine, but remember where it is.
Click Clone to download the files … and all of the associated history to your computer.
Step 2: Add new files to the cloned directory#
Download this zip file from MikeTrizna/github-without-command-line, and unzip to your Downloads folder (or anywhere else, temporarily). This .zip file contains 2 more avocado recipes in Markdown format, but you could imagine it containing several more.
Copy or move the new Markdown files to the directory that you cloned from GitHub.
Exercise
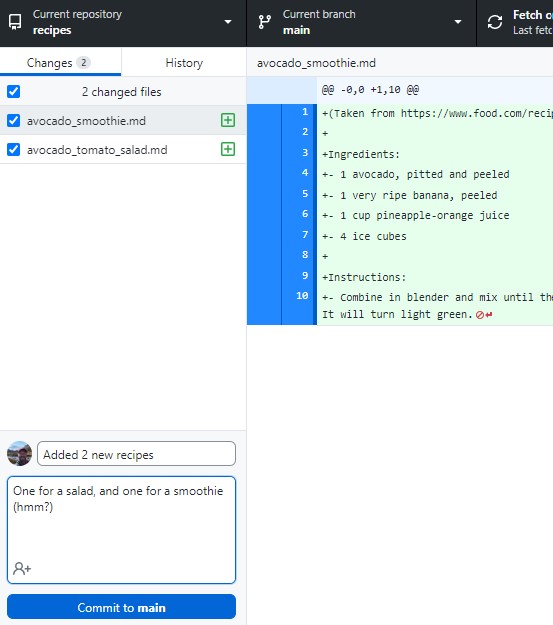
How has the Changes tab of the GitHub Desktop window updated?
Enter a commit message and description at the bottom of the Changes tab, and click the blue Commit button.
Now check out the History tab to see your latest commit.
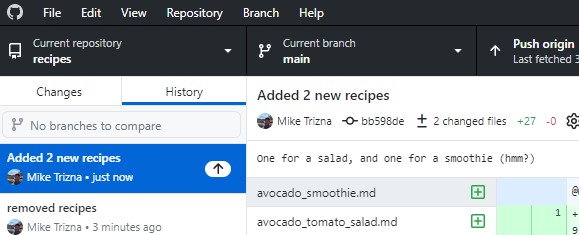
Browse to the repository on the GitHub website. Do you see the changes you just made?
Even though you have committed the changes to the Git history, they have not made their way to the GitHub repository. You will need to click to Push changes button in the top right to send them to GitHub. Do that now.
Now the changes should appear on GitHub.
Step 3: Make a conflicting change#
But what happens if you (or a collaborator) make conflicting changes on the GitHub website and on your local copy?
Make a change in the README.md file of the web version to add internal links to the new recipes. On the web add the link to avocado_tomato_salad.md first, and then avocado_smoothie.md second.
It should look like this:
# Avocado Recipes
A collection of my avocado recipes

* [Salad](avocado_tomato_salad.md)
* [Smoothie](avocado_smoothie.md)
* [Guacamole](guacamole.md)
Commit this change.
Now open the local copy of your README.md in a text editor, and add internal links to avocado_smoothie.md first, and then avocado_tomato_salad.md second. Commit the change.
It should look like this:
# Avocado Recipes
A collection of my avocado recipes

* [Smoothie](avocado_smoothie.md)
* [Salad](avocado_tomato_salad.md)
* [Guacamole](guacamole.md)
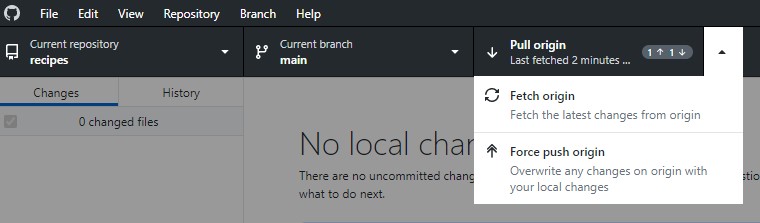
Try to push the changes to GitHub. What new options appear in the place of “Push origin”?
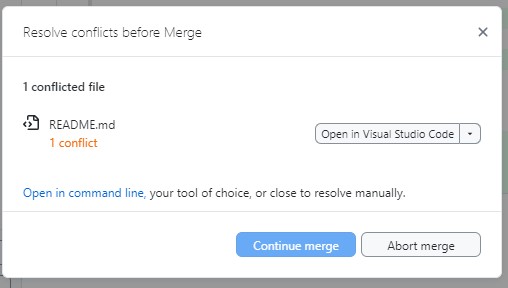
Click on “Pull origin”. You should get a warning like this:
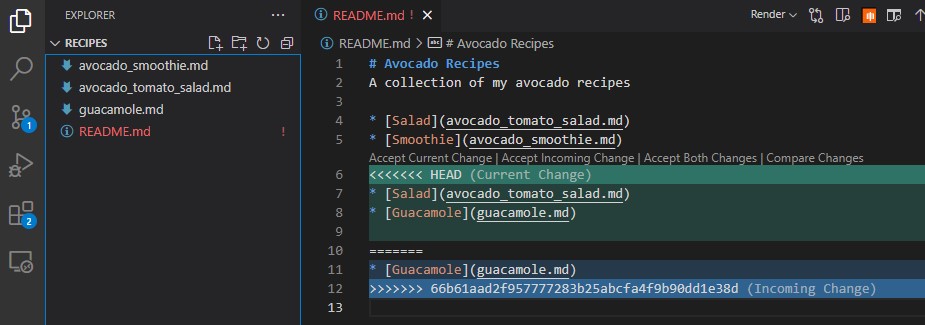
Go back to the local copy of the README.md file in a text editor. What has changed?
Now remove the conflicting text lines, and try pushing to GitHub again.
Resolving conflicts
Running into a git conflict is scary. If you feel like you are digging a deeper hole as you try to resolve the conflict (and the changes you are trying to make are minor), you can always Remove the local copy of the repository and clone it from GitHub again from scratch.